Pages

Tuesday, August 13, 2013

Strawberry sundress - New Look 6796

I've been on a complete sewing spree this summer. I feel like I've made several evolutionary leaps forwards. I've tackled zips, bias binding tape, gathers. I've even drafted my own patterns. A year ago I could barely sew in a straight line let alone breath at the same time. I still struggle big time with understanding patterns and I am a little intimidated by my sewing machine - okay quite a lot. But I am getting more and more ambitious about what I tackle.
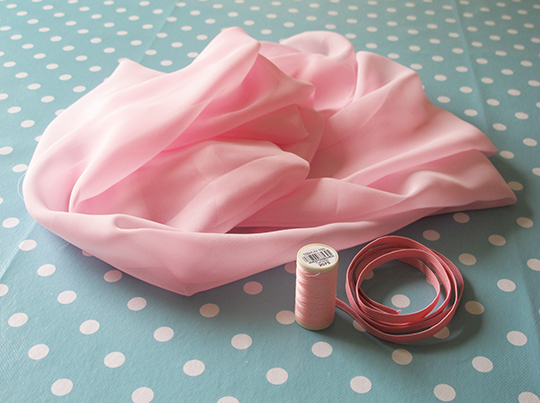
This super cute sundress is a New Look pattern. I went for view A but without the ruffle along the bottom - too fussy. The fabric was from my perennial favourite, fabricland. I love that nothing costs much more than £3 a metre. I'm too scared to cut into anything more pricey! I opted for age 2 width and age 3 length and like the other New Look pattern I tried a few months back, the fit was just right.

I was so happy with the finished garment but this dress threw quite a few curve balls at me. For starters my sewing machine was playing up and some of my stitches were loopy and loose especially down the side seams. I kept rethreading and checking in a very OCD way that my needle was up and the presser foot raised. I tried adjusting various dials but couldn't get a neat stitch. I think either the cotton thread was at fault. It was Coats but seemed slightly 'hairy'. Maybe it was a dud reel. Or possibly I threw everything out of kilter when I forced a zip under the wrong presser foot.
Also I was not anticipating having to make my own bias binding tape - eek! Or add gathers. This pattern was supposed to be easy! I read a couple of Dana tutorials here and here and did a pretty decent job of both. In fact I can see there is something quite addictive about making bias tape. I was slightly thrown by the different shape and size of the 'bib' in the illustrations compared to the pattern pieces. They seemed completely different and I wasn't quite sure what I was aiming for. I'd love to see other people's take on this dress.
I would make this dress again. I'm quite keen to have a go at view B which uses bias binding for the straps as well as neatening off the armholes. But before I do, I really need to make something for my ocean-mad little boy. That's a toy shark he's clutching. He has already picked out some fabulously jazzy underwater sealife fabric with strict instructions that I am to make a pair of shorts for him.

Monday, August 12, 2013

Bathroom revamp: destruction

Things have to look worse before they look better, right? I'm hoping that's true. Big M set to work with a vengeance on the bathrooms, well bathroom as two are now knocked into one. This is what it looked like before he attacked the partition wall with a sledge hammer.
Loo on one side, bath and sink on the other. Did you spot my inadequate attempt to make the bathroom look more homely with a pretty shower curtain? Didn't work. The children and I shipped out for a couple of days to my parent's house, so M could raise up a dust storm on his own. Little M has asthma and there was no way I wanted to risk an attack.
Yay! Here he is breaking through to the other side!
As well as knocking down the wall, he pulled up the floor, removed both radiators and capped off the flow and return pipes, took the light switches off the wall and set up a temporary switch in the hall. Oh and he kindly put the camera on timer so he could record the wall coming down. This is how things looked when we got back.
As soon as I saw the room I instantly dropped all my plans for a new layout. Far too much work and the existing set up works just fine. M is going to leave the bath in until the very last minute as the kids hate showers. They don't like water on their heads or faces. You can imagine how much fun hair washing is in our house! At least the weather is good right now. Maybe I can hose them down in the garden...?

Friday, August 9, 2013

Charlotte's Web dress - Butterick B4718

The original plan was to make this Butterick dress for little P's birthday back in June. I had this cute blue and white gingham fabric with pink roses, which I thought would work perfectly with dress C but with the shorter length of dresses A and B.
 
I was toying with the idea of a Charlotte’s Web themed birthday party and I thought little P would make a great Dakota Fanning in her gingham dress. Okay I know the two dresses are totally different. It was more an inspired by than an actual copy of the dress below.
 
As a kid I longed for a proper big girl dress with a skirt that spun out when I twirled around and a waist around my middle and not up about my earholes. As far as I know little P doesn’t share this dress dream. But if there is a decent dose of pink thrown in, it’s all good in her book.
 
Back to the birthday - I had a mental picture of the garden full of hay bales, a petting zoo with piglets, spider's web-shaped climbing ropes hanging from the trees. It would have been amazing but in the end I didn't get the dress finished in time and the only nod to Charlotte was the pig-shaped cake. We all had a great time even without the extra Charlotte paraphernalia!
 
The reason the dress was only half cut out on the eve of her birthday was I ran out of fabric. I made a silly mistake early on and misread the layout instructions. I hadn’t understood that a piece which is shown half dotted half plain in the layout is actually one piece not two and you are supposed to cut it out last of all. Well I snipped it in two and was suddenly missing half my bodice.
There wasn't time to get more fabric - in fact the shop had completely run out - so I put the whole project to one side. When I came back to it recently, I realised if I lined it in a contrasting fabric and turned one of my back bodice pieces into a front piece it might just be salvageable. Luckily I'd cut out the back as one piece not two. I already had a bubblegum pink zip to go with the roses so I picked out a matching pink lining fabric. I really liked the little peek of pink at the neckline and armholes. In fact I was really proud of how the bodice turned out. Everything lined up and looked really neat.
The zip was more troublesome. I couldn't make sense of the instructions and wasn't even sure what sort of zip I was aiming for. After a fair amount of pinning and experimenting I figured out how to attach the zip to the outer fabric. I then sewed as close as I could to the zip teeth with my regular presser foot. It worked fine but I seem to have sent the thread tension out of whack ever since!
I was completely bamboozled about how to attach the lining fabric to the zip and hide the raw edges. I had already sewn up the side seams and attached the bodice to the skirt so there was no way of turning the fabric inside out. I really didn't want any raw edges along the zip so hand sewed the zip to the lining inside which looked okay. 
Sometimes dressmaking feels like figuring out a rubix cube. I think next time I would attach the zip to the bodice before sewing on the skirt so I could machine the inside. I would also tuck away all those raw edges where the skirt joins the top. Maybe I'd have to hand stitch all the way around the waist?
The finished dress looked great but initially the fit was terrible. I used age two sizing for the width and age three for the length as that matched little P’s measurements most closely. The length was fine but it was ridiculously large around the body. Rather than unpick the zip - I couldn’t face it - I snipped it out and bought a new one. It was only 40p. Then I took the whole thing in by a couple of inches around the back. I thought it might throw the armholes out of kilter but it worked just fine.
And here it is. It's pretty. It's comfy. It has a satisfyingly swirly skirt. It's great for a party or just playing out in.
She loves it! I love it and would definitely give this pattern another go.

Saturday, July 27, 2013

My perfect burger


Okay first up I can’t claim to be an authority on burgers. Coffee yes. Cinnamon rolls definitely. Cocktails maybe once upon a time. But burgers… I never eat them outside of barbeque season. I’m not American. I have never set foot inside an In-N-Out burger. I haven’t even tried a big mac for goodness sake

But the sun is shining, there is a delicious smoky meaty smell wafting over the neighbours’ fence and I’m thinking we should fire up the barbeque ourselves. Throw on some marinated chicken, a few sausages and of course a hamburger or two. I am pretty particular about my burgers. I think because I eat them so rarely I want them to be a special treat.

My absolute favourite place for a burger used to be the Eagle Bar Diner off Tottenham Court Road. I think it has closed down now and apparently it went off in later years but I used to love it. My favourite thing to order was a hamburger, fat chips and a lychee martini. Blissful.

If I am making a DIY burger at home, this is how I go about achieving burger perfection. First of all you need the right climatic conditions. A truly fabulous burger can’t be cooked indoors under the electric grill. It needs sunshine, charcoal and lots of patience to get the barbeque to just the right temperature. A fierce enough heat to char the meat and give it a bit of surface crunch but not too hot that it dries out the juices. Medium rare is best.

The bread roll has to be white and soft inside but with a tiny bit of crunch – almost imperceptible - on the crust. Preferably homemade and fresh from the oven. (I admit the roll in my picture is less than perfect. I ran out of white flour and had to mix in some wholemeal.) Your bread to meat ratio has to be spot on too. Burgers that are nothing but great mouthfuls of fluffy white bread and hardly any meat are a sad disappointment. Likewise there is nothing messier or more frustrating than struggling with a generous-sized burger and toppings but not enough bread to hold the thing together.

Before adding anything to the roll, I spread it with a thin layer of butter to waterproof the bread. Soggy bread has no place near a perfect burger. There are several must have ingredients; coleman’s mustard, ketchup and gerkins and/or jalepenos to give sweetness and kick. I also like piri piri sauce but it’s an optional extra. I think with a burger you are aiming to pack every flavour and texture into one bite. Sweet, salty, spicy, bitter, meaty, juicy, dry, fresh, crunchy, crisp and smooth. It’s all there.

Sometimes I am satisfied with a nice piece of crisp lettuce and nothing else. Other times I quite like a bit of Stilton melted on top. But my number one all time favourite burger toppings are watercress (the big dark green leafy stuff obviously) and pickled beetroot.
So that is my perfect burger. Now I just need to figure out how to recreate that lychee martini.

Happy barbequing!

Tuesday, July 9, 2013

Here comes the heatwave

We ditched our weekend beach plans at the last minute predicting traffic jams, parking hassles, hot and bothered kids and had a wonderfully relaxing - and hot! - couple of days pottering around the garden instead. The kids did some painting outdoors and chalk drawing on the paving stones which was a first for them. And we finally got around to planting a new vegetable patch. Check out the monster chard from last year! Everything is about a month late going in the ground but we had a late spring so maybe it'll all even out.

Sunday, July 7, 2013

How to make: a chiffon ballet skirt

Little P started ballet lessons recently and I think I love it as much as she does, possibly more. The mums sit on chairs at the front – as I remember my mum doing when I did ballet as a child – and we grin like Cheshire cats (well I do) for a solid half hour as the lovely Miss Leanne puts them through their paces.
I paid up happily for most of the uniform; pink leotard, matching socks and ballet shoes but I balked slightly at the price of the chiffon skirt. I think I had just paid out a series of cheques for swimming, rugby, art club etc and that additional £8.99 just felt like too much for a flimsy handkerchief-sized piece of material. But I coughed up and she did look gorgeous. In fact she loved the skirt so much she started wearing it everywhere and inevitably it got lost and could not be found.

I was blowed if I was going to buy another but after a skirtless couple of weeks of failing to find a cheaper one anywhere I decided I would make one. How hard could it be? Essentially it is a circle skirt with an elasticated waistband. The fabric, thread and pink elastic cost less than £3. 
I was starting to feel pretty smug but I hadn’t factored in the hideousness of sewing with chiffon. That stuff is a nightmare! I had to quickly shelve ideas of a proper hem or my raw edges being neatly tucked away inside a waistband. Instead I zigzag stitched along the top and bottom of the skirt and left it at that. I think the end result looks pretty okay.
If you would like to make a pretty chiffon ballet skirt, here’s how I did it. First of all you need to drag a bit of basic maths from your memory. Don’t worry nothing too tricky. You are going to be drawing two circles. The smaller circle is the waist and has to be roomy enough to pull up over her bottom so measure round her tummy and her hips and go with the larger measurement. Your next measurement is for the length of the skirt. Measure from her waist down to her knees or mid thigh or where ever you need the skirt to end. Your finished skirt will look something like this.
Right so now you have two measurements waist or hip circumference and length. Here is what you are going to do with them. Take the waist measurement and add 1 inch (just to be sure she can get that skirt on and off easily). Now to get the radius divide waist plus 1 by 6.28. So Little P’s waist measured 19 inches, plus 1 inch is 20 inches, divide that by 6.28, you have 3.18 inches.

First you are going to cut out a template in paper. Get a great big piece of paper – newspaper, baking paper, wrapping paper. Tape several bits together if you need to. You are going to be drawing just one quarter of your skirt. Using your tape measure or a ruler you are going to draw in the waistline by making a series of dots the radius distance (3.18 inches for Little P) from the corner. Easier to see than explain!
Once you have the waistline drawn in, you are going to draw in the rest of the skirt using the same method. Add your radius (3.18) to your length now measuring again from the same bottom corner dot in the rest of your skirt. Now cut along your dotted lines. The finished template should look like this.
Okay. Fold your fabric in half and half again and place your template on top. Cut it out. And voila you have a circle skirt!
You’re not finished yet. Thread up that machine and zigzag stitch around the waist and the hem. My stitches ended up being quite tight and puckered up the material which normally would have been a disaster but on the chiffon seemed to look okay and gave a bit of weigh to the hem.
I found sewing a waistband with chiffon very very fiddly but this way worked well for me. First check your girl's tummy measurement then cut a length of elastic 1 inch longer. Use that extra one inch to overlap the elastic and sew together. Now for the tricky bit, sewing the elastic belt into the waistband. I found pinning the fabric first just made the job harder. For me folding the fabric over the elastic and sewing very very slowly and carefully round adjusting all the time to minimise the inevitable puckers and twists. 
Be careful not to sew your elastic to your skirt as you go! Sew all the way around and hey presto you have a beautiful ballet skirt!
Your little ballerina is all ready to jete, pirouette and arabesque her way off to class.