Pages

Saturday, July 27, 2013

My perfect burger


Okay first up I can’t claim to be an authority on burgers. Coffee yes. Cinnamon rolls definitely. Cocktails maybe once upon a time. But burgers… I never eat them outside of barbeque season. I’m not American. I have never set foot inside an In-N-Out burger. I haven’t even tried a big mac for goodness sake

But the sun is shining, there is a delicious smoky meaty smell wafting over the neighbours’ fence and I’m thinking we should fire up the barbeque ourselves. Throw on some marinated chicken, a few sausages and of course a hamburger or two. I am pretty particular about my burgers. I think because I eat them so rarely I want them to be a special treat.

My absolute favourite place for a burger used to be the Eagle Bar Diner off Tottenham Court Road. I think it has closed down now and apparently it went off in later years but I used to love it. My favourite thing to order was a hamburger, fat chips and a lychee martini. Blissful.

If I am making a DIY burger at home, this is how I go about achieving burger perfection. First of all you need the right climatic conditions. A truly fabulous burger can’t be cooked indoors under the electric grill. It needs sunshine, charcoal and lots of patience to get the barbeque to just the right temperature. A fierce enough heat to char the meat and give it a bit of surface crunch but not too hot that it dries out the juices. Medium rare is best.

The bread roll has to be white and soft inside but with a tiny bit of crunch – almost imperceptible - on the crust. Preferably homemade and fresh from the oven. (I admit the roll in my picture is less than perfect. I ran out of white flour and had to mix in some wholemeal.) Your bread to meat ratio has to be spot on too. Burgers that are nothing but great mouthfuls of fluffy white bread and hardly any meat are a sad disappointment. Likewise there is nothing messier or more frustrating than struggling with a generous-sized burger and toppings but not enough bread to hold the thing together.

Before adding anything to the roll, I spread it with a thin layer of butter to waterproof the bread. Soggy bread has no place near a perfect burger. There are several must have ingredients; coleman’s mustard, ketchup and gerkins and/or jalepenos to give sweetness and kick. I also like piri piri sauce but it’s an optional extra. I think with a burger you are aiming to pack every flavour and texture into one bite. Sweet, salty, spicy, bitter, meaty, juicy, dry, fresh, crunchy, crisp and smooth. It’s all there.

Sometimes I am satisfied with a nice piece of crisp lettuce and nothing else. Other times I quite like a bit of Stilton melted on top. But my number one all time favourite burger toppings are watercress (the big dark green leafy stuff obviously) and pickled beetroot.
So that is my perfect burger. Now I just need to figure out how to recreate that lychee martini.

Happy barbequing!

Tuesday, July 9, 2013

Here comes the heatwave

We ditched our weekend beach plans at the last minute predicting traffic jams, parking hassles, hot and bothered kids and had a wonderfully relaxing - and hot! - couple of days pottering around the garden instead. The kids did some painting outdoors and chalk drawing on the paving stones which was a first for them. And we finally got around to planting a new vegetable patch. Check out the monster chard from last year! Everything is about a month late going in the ground but we had a late spring so maybe it'll all even out.

Sunday, July 7, 2013

How to make: a chiffon ballet skirt

Little P started ballet lessons recently and I think I love it as much as she does, possibly more. The mums sit on chairs at the front – as I remember my mum doing when I did ballet as a child – and we grin like Cheshire cats (well I do) for a solid half hour as the lovely Miss Leanne puts them through their paces.
I paid up happily for most of the uniform; pink leotard, matching socks and ballet shoes but I balked slightly at the price of the chiffon skirt. I think I had just paid out a series of cheques for swimming, rugby, art club etc and that additional £8.99 just felt like too much for a flimsy handkerchief-sized piece of material. But I coughed up and she did look gorgeous. In fact she loved the skirt so much she started wearing it everywhere and inevitably it got lost and could not be found.

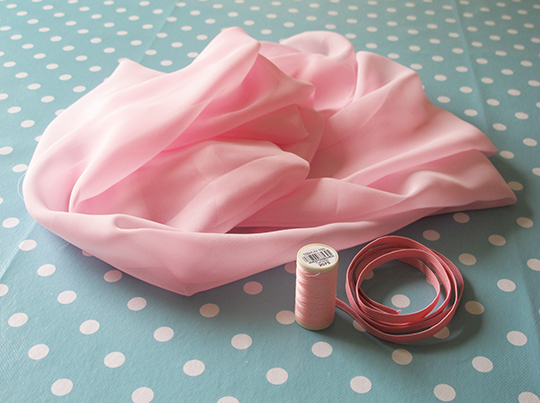
I was blowed if I was going to buy another but after a skirtless couple of weeks of failing to find a cheaper one anywhere I decided I would make one. How hard could it be? Essentially it is a circle skirt with an elasticated waistband. The fabric, thread and pink elastic cost less than £3. 
I was starting to feel pretty smug but I hadn’t factored in the hideousness of sewing with chiffon. That stuff is a nightmare! I had to quickly shelve ideas of a proper hem or my raw edges being neatly tucked away inside a waistband. Instead I zigzag stitched along the top and bottom of the skirt and left it at that. I think the end result looks pretty okay.
If you would like to make a pretty chiffon ballet skirt, here’s how I did it. First of all you need to drag a bit of basic maths from your memory. Don’t worry nothing too tricky. You are going to be drawing two circles. The smaller circle is the waist and has to be roomy enough to pull up over her bottom so measure round her tummy and her hips and go with the larger measurement. Your next measurement is for the length of the skirt. Measure from her waist down to her knees or mid thigh or where ever you need the skirt to end. Your finished skirt will look something like this.
Right so now you have two measurements waist or hip circumference and length. Here is what you are going to do with them. Take the waist measurement and add 1 inch (just to be sure she can get that skirt on and off easily). Now to get the radius divide waist plus 1 by 6.28. So Little P’s waist measured 19 inches, plus 1 inch is 20 inches, divide that by 6.28, you have 3.18 inches.

First you are going to cut out a template in paper. Get a great big piece of paper – newspaper, baking paper, wrapping paper. Tape several bits together if you need to. You are going to be drawing just one quarter of your skirt. Using your tape measure or a ruler you are going to draw in the waistline by making a series of dots the radius distance (3.18 inches for Little P) from the corner. Easier to see than explain!
Once you have the waistline drawn in, you are going to draw in the rest of the skirt using the same method. Add your radius (3.18) to your length now measuring again from the same bottom corner dot in the rest of your skirt. Now cut along your dotted lines. The finished template should look like this.
Okay. Fold your fabric in half and half again and place your template on top. Cut it out. And voila you have a circle skirt!
You’re not finished yet. Thread up that machine and zigzag stitch around the waist and the hem. My stitches ended up being quite tight and puckered up the material which normally would have been a disaster but on the chiffon seemed to look okay and gave a bit of weigh to the hem.
I found sewing a waistband with chiffon very very fiddly but this way worked well for me. First check your girl's tummy measurement then cut a length of elastic 1 inch longer. Use that extra one inch to overlap the elastic and sew together. Now for the tricky bit, sewing the elastic belt into the waistband. I found pinning the fabric first just made the job harder. For me folding the fabric over the elastic and sewing very very slowly and carefully round adjusting all the time to minimise the inevitable puckers and twists. 
Be careful not to sew your elastic to your skirt as you go! Sew all the way around and hey presto you have a beautiful ballet skirt!
Your little ballerina is all ready to jete, pirouette and arabesque her way off to class.

Monday, June 24, 2013

Bathroom revamp: dreaming

The truth is I am not really a bathroom kinda girl. Check out my pinterest boards and you’ll see 131 kitchens at the last count and only 6 bathrooms. There a few more tucked away on my decorate board but only because I thought the tiles had potential for a kitchen renovation. I don’t dream of recreating some luxury spa experience I had in Thailand. I hate massages. I’m not into beauty treatments. My favourite product is nivea soft because it does the job and it's cheap. I see the bathroom as a very functional room, not somewhere to linger. The truth is I am finding it difficult to visualise what my dream bathroom could look like.

I do however have a list of criteria; clean, simple, light, contemporary, inexpensive and no subway tiles. I am not a fan. It is more an association thing than a style prejudice. My husband loves them but then he hasn’t spent great swathes of his life travelling up and down the Northern Line. I can’t imagine anything worse than relaxing in a hot bath glancing at your tiles and suddenly being transported to the stink, heat and airlessness of the underground at rush hour.

The reality is we have almost no money to spend on this project and I am slightly fearful that if our design choices are too simple, the bathroom could end up looking purely functional verging on institutional. I prised myself away from the many beautiful kitchens seducing me online and trawled about for some bathrooms to get excited about. And guess what? I did get excited. How amazing is that flamingo above the bath? Only for most of these bathrooms you would need a pretty hefty budget and to live in some amazing high-ceilinged period house chock full of original features. So that rules out our boxy practical 1970s house then. Still I found plenty to inspire me. (All images are credited below where possible). Which ones do you like?


Images from top to bottom:
originally pinned from Pretty Plum Sugar
Chic Design Investments
Bad pinterest link. Can't find original source.
Can't find this last one either. Let me know if you do!

Bathroom revamp: meet the bathrooms

When we moved into this house almost two years ago, top of our to do list was to get rid of all the weird textured metallic wallpaper and paint every room white. The next job was to rip out the bathrooms. “There is no way I can live with those bathrooms for even a month,” I seem to remember saying. Well two years on we have the white walls but the family bathroom, en suite and downstairs loo are just the same. Okay we tore up the carpet in the loo and replaced it with lino when the smell of stale pee became overpowering but otherwise not much has changed.
I am guessing from the swamp green floral tiles that this bathroom was put in sometime during the 80s. It is dark, dull and depressing and never feels properly clean. 
 
The family bathroom is split into two rooms – bath and sink in one room and loo in the other. It's a ridiculously inconvenient layout so we are going to knock down the dividing wall and block up one of the doorways to create one big light-filled room.
Then we may swing the bath around so instead of being wedged in against the short wall, it runs along the external wall under the windows. And we desperately need some storage. At the moment all our shampoos, shower gels and bubble baths are crowded along the windowsill.

We are on an extremely tight budget in the sense that we really don’t have any money to spend at all. Big M is going to do all the work himself on weekends and after work – well that’s the idea anyway. We are already looking out for bathroom suites and tiles that don't break the bank but are still relatively stylish. In a dream world I'd be going to made a mano for tiles but I think the reality is more Wickes and Topps Tiles.

Wish us luck!

Wednesday, June 12, 2013

Dinosaur cake

This beauty is my first ever attempt at a novelty birthday cake. And I have to say I am mighty proud of him. Little M like most boys his age is OBSSESSED with dinosaurs. I would be surprised if there are many palaeontologists out there more informed than he is. Initially I had no intention of making one myself but by the time I had unsuccessfully scanned all the supermarket shelves and got a quote from a local baker (too pricey), I realised it was all down to me.


The fanciest I have ever got with a birthday cake before is to write their new age in smarties on the top of a Victoria sponge so this was quite a leap. I used a Nigella recipe for a birthday buttermilk cake which is supposed to be good for holding unusual shapes. And I baked it in this cake tin. Don’t worry I didn’t sculpt the whole thing myself. 
 
I was forewarned by reviews on amazon that you needed to use cake release spray to grease the tin. It is pretty gruesome stuff. It contains wax and all sorts of worrisome ingredients.
 
It worked because the cake slipped out like a dream but did leave a weird bubbly texture across the surface. Here he is in all his naked T-rex glory.
I did have to mentally ease up on what I do and don’t allow the kids to eat for this cake. The green icing I used had a warning on the pack that one of the E numbers could cause kids to become over-active. I reasoned a birthday comes once a year and I could have them back on the healthy stuff the next day.


I rolled the icing as thin as I dared and draped it over the cake. I was convinced I would immediately lose all the lovely dino detail but it came through after a bit of gentle pressing and stroking.

I used squeezy tubes of fruit gel for cake decorating to pick out the details and cut out triangles of white icing for the teeth and circles for the eyes and dotted jelly tots everywhere. My friend who must be psychic texted me at 10pm saying I hope you are not up making the cake. I was. You can see my espresso cup in the background.  

The birthday boy loved it though you wouldn’t know from this rather melancholy picture post candle blow out. Maybe he’s focusing on his birthday wish.
And Little P couldn’t get enough of the green icing. I kept a sharp eye on her for signs of hyperactivity but I think she was okay.


I was trying to psyche myself up for another novelty cake bake a few days later for Little P’s birthday. She had her heart set on a Hello Kitty cake but I was feeling a little baked out. I knew I had found my perfect out when I spied this pink piggy in M&S.

My kids’ current film obsession is Charlotte’s Web so when they saw Wilbur in cake form I knew I was off the hook, Hello Kitty well and truly forgotten. I was going to make an accompanying Charlotte from a tunnocks teacake and eight chocolate fingers but we all forgot so it didn’t really matter.
Maybe next year...

Tuesday, June 11, 2013

It's my party and I'll cry if I want to

Phew! I’ve thrown two birthday parties in one week. Little M turned five and little P three within days of each other. It was the first time I'd done separate ‘at home’ parties for them and oh my goodness it was hard work! I hadn’t realised how much preparation was involved.

Little M’s party fell on the only rainy day of the week, which meant no bouncy castle in the garden and ten boisterous boys bouncing around indoors instead. Luckily I was ready with plan B, a military precision schedule of party games and party food all timed to the last minute.
I am always amazed at other children's parties how kids love doing crafts. I guess they need something calming after all that jumping around. I’ve seen crown making, colouring party bags and biscuit decorating all go down really well. We opted for shield making. I cut out shield shapes in gold and silver card and they decorated them with stickers, pompoms and feathers. It was amazingly popular and we had a prize for the best knight.
As a complete contrast, it was a gloriously hot day on Little P’s birthday, so we had a very easy laid back party in the garden. We finally got our bouncy castle. Hurray! And a rather bizarre warning not to have a barbeque on it. We only needed a couple of party games as the children seemed happy enough racing around the lawn.
We survived it. The children had fun. And there weren't too many tears that couldn't be dried with a packet of Haribos. So here are my tips for hosting a children's party;
  • Get help: I’m not including husbands or partners here. You need expert multi-taskers. That means women. Recruit your mum, sister, sister-in-law, other mum friends.
  • Keep it simple: Yes I know you want to go all Nigella Lawson domestic goddess but save yourself the hassle. Kids want chocolate finger biscuits and hula hoops. Save your tiffin recipe for a rainy day with the kids. Ditto making your own bunting. Ditto sewing a homemade party dress. You don’t have the time!
  • Keep it cheap: I discovered the marvels of the 99p store. Stock up on cute paper cups and plates, party bag supplies, balloons, pass the parcel gifts, pretty much everything here.
  • Plan, plan, plan: Make a playlist in advance. Gangnam Style seems to be the party song of choice for YR boys. Dora Explorer is a winner for pre-school girls. I can report that Skyfall was only a popular choice with me. Decide in advance what games you are playing and when you are eating.  
  • Haribos: These little gummy wonders are your secret weapon. Hand them out frequently to keep everyone sweet.
  • Party bags: If all else goes wrong at least you are sending them on their way with a good party bag which will wipe all preceding disasters from their memories. That is my theory anyway. I put plastic dinosaurs, pencils and haribos in bags for Little M’s friends and fairy wands, bouncy balls and haribos in Little P’s friends.
  • Remember: They will be excited about hanging out with each other outside school or pre-school. All the rest is flim flam.
And finally, put a bottle of prosecco in the fridge to chill for later on. You've earned it!