The last time I made a Christmas craft was at playschool. It was a snowman tree decoration made from a loo roll wrapped in cotton wool, a painted egg carton hat, crepe paper scarf and a glittery button. I remember him so well because until he disintegrated a few years ago, he was still a fixture on the christmas tree at mum and dad's house.
Every year I think it would be fun to make an advent calendar and this year I finally got around to it. Well I was a day late but that was okay as the children got two days for the price of one.
Yay! Chocolate money!
If you want to make one too here's how I did it.
I ordered some cheap and cheerful Christmassy fabrics from Fabricland along with some green gingham ribbon and red and green felts. I got the 18" wooden dowels super cheap (about 25p each)
online. You will also need bondaweb unless you have more patience than
me and want to sew all the numbers on.
To make an 16" by 18" wall hanging I cut out one large 17"x40" piece and five smaller 4.5"x16" pieces. I was kind of generous with my seam allowances. You could cut smaller and still end up with five long pockets measuring 3"x15".
Okay, let's start with the backing. Take the large piece of fabric and fold it in half joining the two short ends together with the right side of the material on the inside. Sew the ends together, then iron out the seam. Hem both sides of your fabric, ironing the crease in first for neatness and ease of sewing. I was using polycottons and they were pretty slithery!
Next we are going to get the wooden dowels in place. Spread your backing piece, now neatly sewn together and hemmed, on the table with the seam at the back. I placed the seam near the bottom to give (a tiny bit) more weight to the hanging. Slide the dowels into place and draw a straight line across the top and bottom of your hanging where you want to place a seam to hold them in place. Remove the dowels and sew along your seams.
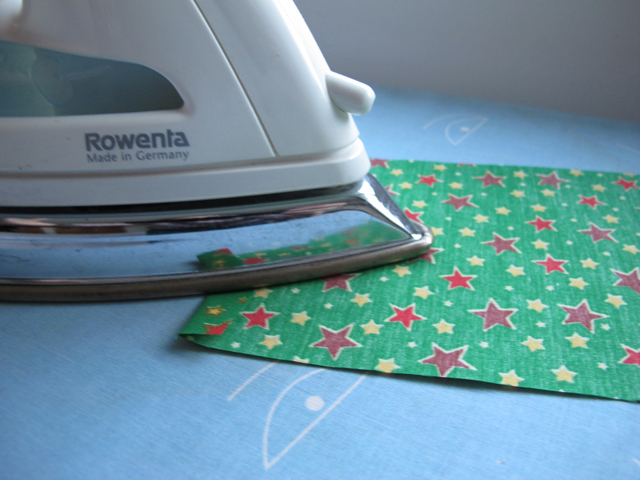
That's the backing done. On to the pockets. First we are ironing our pockets ready to hem them and sew them on later. Fold over the short edges of each piece and iron.
Then fold over the long edge which will become the top of your pocket TWICE and iron. Now fold over the long bottom edge just once and iron. Now snip off the tiny corners in the folds to reduce bulk.
Okay you can sew now but just along the top of each strip.
Your pockets are ready for some numbers.
I used red and green felt and printed out digits from 0 - 9 in century gothic, size 100. I also printed out the children's intitials to personalise each calendar. I used bondaweb to attach my numbers, but I am not convinced it is any faster than doing machine applique. I've never given it a go but maybe next time...
I also drew out a plan of where each number should go. If you are mixing the numbers up this is so important, especially if you are doing more than one calendar.
Trace your numbers onto the papery side of the bondweb BACKWARDS. They get reversed when you finally iron them on. I found it easier to do with the paper against a window. You will need numbers from 1 to 24. I put the children's initials in the central pocket to take care of the spare 25th pocket.
Now iron your bondaweb numbers onto your felt, papery side up and rough side down against your fabric. Then get cutting. I had rubbish scissors and I found this bit really tedious but luckily we had some lovely friends round who were keen to take over the job. Thanks L and I!
Peel the paper backing off your numbers, place on your pockets using a ruler to space them evenly and you are ready to iron them on.
Put a damp cloth over your pockets and iron each number for about ten seconds.
Okay let's get those pockets on. Pin them in place.
Then sew along the sides and the bottom to fix them in place and hem them all at the same time. Don't sew along the top of your pockets or you won't be able to open them - disaster!
Nearly there. Divide each long pocket into five smaller ones. Use a ruler to space evenly.
Now sew along your chalk lines. I sewed one continuous line from top to bottom to save stopping and starting all the time. I was sewing in a rather wild and reckless fashion at this stage and also did a fair amount of unpicking. Pop your wooden dowels back in place. Tie some pretty ribbon to each corner and you have a lovely Christmassy personalised advent calendar.
Fill it with chocolate money, hair clips, shiney pennies, sweet notes, little sketches, conkers, acorns, lego, sequins, whatever.
Enjoy and have a very happy Christmas.